PAI Lab이 피지컬 컴퓨팅 연구 및 커리큘럼에서 아두이노를 활용하는 방법.
Arduino at PAI Lab
The Physical AI Laboratory uses Arduino-family microcontrollers as the primary entry point for students new to physical computing. Arduino’s open-source ecosystem, low cost, and large community make it ideal for undergraduate research and coursework.
Why Arduino?
- Approachable — C++ syntax with helpful abstractions (digitalWrite, analogRead)
- Widely documented — thousands of tutorials, datasheets, and forum answers
- Hardware variety — Uno, Nano, Mega, Leonardo, and compatible clones
- Direct path to ESP32 — Arduino IDE supports ESP32, making the transition seamless
Related Curriculum
The PAI Lab Arduino curriculum is structured as a progressive track:
- Arduino: Foundations of Physical Computing — begins with LEDs and ends with a self-driving robot
Hardware in the Lab
The lab maintains a shared kit for student use:
| Component | Quantity |
|---|---|
| Arduino Uno R3 | 10 |
| Arduino Nano | 5 |
| Half-size breadboards | 20 |
| Starter sensor kit | 5 |
| L298N motor drivers | 8 |
| Robot chassis kits | 4 |
Borrowing Equipment
Lab members can borrow equipment for their projects. Contact the PI or check the equipment log in the members dashboard.
About Arduino
Arduino is an open-source electronics platform based on easy-to-use hardware and software. It’s intended for anyone making interactive projects. The more you learn about Arduino, the more you can do with it. For example, you can build robots, art installations, interactive games, do research for Conferences, build prototypes, make your Capstone project, and much more.
Getting Started
Most Arduino kits come with an Arduino UNO board, USB cable, and a variety of sensors and actuators. You can also buy additional components online or at local electronics stores.
Buy a Kit
| Korea Basic Kit | Korea Advanced Kit | Official Starter Kit |
|---|---|---|
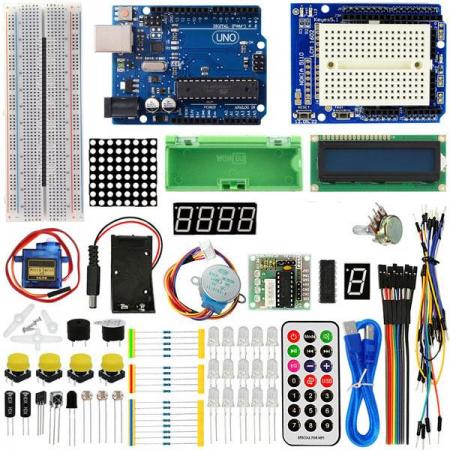 | 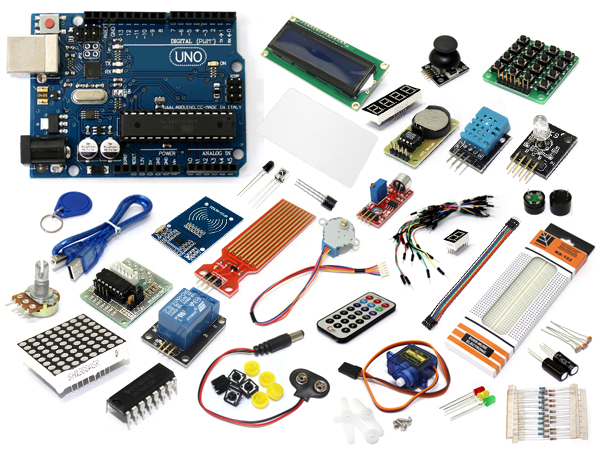 |  |
| Order Basic (Korean) | Order Advanced (Korean) | Order Official (Multilingual) |
Lessons
We will use as many of the Education Starter Kit lessons as possible during the course. You may need to create a free account to access the lessons.
- Lesson 1: Getting Started with Arduino
- Learn how to set up your Arduino board and install the Arduino IDE software.
- Lesson 3: Traffic Signals
- Write programs to control the LEDs in the circuit, including a program for a traffic light.
- Lesson 4: Dimmer Switch
- Attach a potentiometer to the breadboard. The side with two pins should go into holes 28e and 30e. The other pin should be in hole 29g. (Use wires if necessary.)
- Build the “Dimmer Switch Circuit” (halfway down the page).
- Lesson 5: Holiday Lights
- Design and create your own light-up circuit.
- Requirements: You must use between 4-8 LEDs in your circuit (same color or different is optional).
- Components: Push-button switch, potentiometer, one digital/one analog pin on the Arduino board.
- Note: Every LED must have a resistor wired with it in series.
- Code: Use at least ONE variable and ONE conditional (
if) statement.
- Lesson 6: Sports Robot
- Wire the circuit without a capacitor.
- Just make sure the servo motor gets power.
- Lesson 7: Windshield Wipers
- Wire the windshield wipers circuit (you don’t need to add a cardboard wiper)
- Also complete the “Washer Mode” portion
- Lesson 8: Musical Keyboard
- The circuit shows 5 buttons, but our kit only has 4. You can omit the last button.
- Also, our kits do not have different Ohm resistors for each button. You can use the same resistor value for all buttons (e.g., 10k Ohm).
- Lesson 9: Lightwave Radar
- You can choose to build either the Musical Keyboard or the Lightwave Radar project.